Tuesday, November 15, 2011

Finally! Juicing and Kombucha {Food Loves}

Well, my next post WAS going to be my broth process, but due to an incident, I have none of my pictures for it...so as I make my next batches, I will take new pictures and do a post.  :-)  So I thought I'd share about something I have finally gotten into that I have desired very much for so long to do...


Juicing
I never thought I would become a juicer.  But alas, I am mildly obsessed with it!  I think about it way too often, which to me means that maybe my body is really liking it and is benefiting from it.  When I think about juicing and making coffee, I pretty much prefer the thought of juicing.  That is HUGE for me :-).  I am hoping my cravings for coffee will be reduced or taken away by the minerals and enzymes and all that good stuff that I am getting. 

I kind of always thought people were a little weird for juicing because I thought we should be just eating everything we need.  However, if you look at things from a GAPS/SCD perspective (understanding that our guts and bodies are damaged by our inheritance and poor diets and therefore even if we ate enough veggies, our bodies have impaired digestion and therefore cannot absorb everything that's so good for us in fruits and veggies) it makes sense to add this into life.  We are also all probably deficient in minerals and enzymes, so it takes a lot to give our bodies what they need.  Juicing allows our bodies to get all the benefits of raw veggies without the difficulty of digesting them and therefore not getting everything good in them. 

We really want to take the plunge and get a juicer and add it into our days for minerals/enzymes and for aid in digestion.  Constipation, which is very common when on a GAPS diet in the early months (or even longer), can be helped by adding juice in, especially first thing in the morning.  It stimulates bile production, which helps digest fats.  If fats aren't digested well, they can cause issues.  You can read lots of great information all over the internet about juicing. 

One tip if you are concerned about blood sugar effects of juices is to whisk 1-2 raw egg yolks and a spoonful of homemade sour cream (we do use store bought if we are really needing it, although that isn't best because it isn't raw and it isn't fermented as long probably as we would do it) into your juice, making a sort of 'milkshake'. 

So, grab a helper if you and they are so inclined and try it!  (ok, I guess you might need to get a juicer first...)
Little mister loves helping make juice!

 1 large organic red apple, a couple handfuls of kale, 4 stalks of celery, 2 carrots...
 Oh my, I loved this and it feels so good to drink it and I feel so good after I drink these juices!!!  And seriously, let's just be honest, they have immediately greatly improved my digestion :-). 

KOMBUCHA!!!
If I can get into making this successfully, our grocery budget will be super happy.  And therefore, my husband can stop stressing.  ;-).  But seriously, it is incredibly economical to make it yourself - it can seem scary, though!  Someday I will do a cost comparison for what I use to make it.  First I have to actually finish my first batch.  But I am so excited I finally have gotten around to doing this!

I love this stuff.  LOVE.  And I love how it helps my body.  And you can make it with your own preferences in mind by adding small amounts of fruit juices at the end of the process.  Here's some great information about how wonderful this stuff is for you.  


I grew a SCOBY this way.  It worked amazingly well.  If you do it, which I think everyone should :-), do NOT throw it out if it looks like its developing mold on top.  Seriously, it will turn into a beautiful SCOBY. 
 So after you grow your SCOBY, follow this process, which is what I did. 
      1) I did 1 gallon to begin with since I only have 1 SCOBY.  Boil 1 gallon of water, add a lot of tea bags (I used 16! NOTE to SELF: get family size teabags next time!!)  Lipton is great to use and don't worry about it being organic.  Read more here.   Let it steep for 5 minutes, remove bags, add 1 cup sugar.  Let it sit out and cool to room temperature. 
      2) Pour sweetened, cooled tea into a giant gallon glass jar. 
      3) Add 1/2 cup of the kombucha from your starter/SCOBY jar into the gallon and then gently place the SCOBY on top of your tea.  Isn't it weird looking?  It's kinda creepy to handle the first time, but oh well, it's totally a neat science experiement! 
     4) My camera died here, so I don't have a picture of my gallon jar sitting and waiting, but once the SCOBY is in the jar with your tea and 1/2 cup of liquid your SCOBY was in, cover it with a towel, secure well (I used a stretchy hair band), and place the jar in a corner of your kitchen without a lot of light, especially sunlight.  I have mine in a corner near my stove to feed off the warmth created by it ALL the time.  Keep it away from other cultures or electromagnetic fields (don't use a seedling warmth mat, move away from appliance that are plugged in right by it). 

It's supposed to sit for about 5 days and then move on to the next part, which is adding a small amount of fruit juice, capping tightly  (in smaller jars or bottles), and fermenting 2 more days on the counter.  Then you simply move it into the fridge and enjoy. 

ah, I can't wait to update on how it goes...and hopefully it's a great update so that I stop spending our life savings on this amazing drink at the store...

:-) 

So there you go, 2 of my food loves (up there with butter, raw cream, and bacon) added into our lives!!  YAY!! 

Tuesday, November 8, 2011

Hard Boiled Eggs, 2 Simple Soups, and a Chocolate Cookie

I am finding that on Mondays I need to focus on simple meals that are easy to put together so that I can focus on preparing for the remainder of the week and spending some time pouring into our boys after weekends that can sometimes be tiring and busy.

So today I made 2 very simple soups that were easy to put together but still super yummy and satisfying.  They aren't gourmet meals or anything, but I desire to focus on foods that are nourishing and nutrient dense - and sometimes that just means simple but always yummy!

First, though, I wanted to share my little process to making wonderful hard boiled eggs that aren't overdone!  This method also allows for multi-tasking (aka me forgetting to take care of the eggs because I get caught up doing something else!).  There is wiggle room in this that helps so very much!  And really, I am so excited because I have been testing this process over several batches, and they have all come out wonderful!  Cooked, yet still soft (not rubbery!), egg yolks cooked, but not overdone.  And they're easy to peel.  Yay.  So here we go.

Perfect Hard Boiled Eggs {How-To}
(for the easily distracted cook and mom!)


Steps:

  1. Fill your pot with water enough to cover eggs by about 1 inch (guesstimate :-) ) and bring to a boil
  2. Add salt - I usually throw in about 1 tsp-1 Tbsp depending on the size of pot I am using.  This helps with peeling!  
  3. Add your eggs gently (I find a slotted spoon works really well).
  4.  Cover and bring back to a boil. (this is the only part where you need to keep an eye on it at least every now and then).
  5.  Once it comes back to a boil, take lid off and set timer for 5 minutes.  All you have to do during this step is keep it at a gentle boil. (excuse the cooked egg floating in the water...apparently one of my eggs was cracked...don't worry, i removed it!)
  6. After the 5 minutes is up, remove from heat and put the lid back on. Set timer for 5 minutes again.  See, you don't even have to remember another time length!
  7. After those 5 minutes are up, place eggs (grab that spoon again!) in a bowl of ice water.  This stops the cooking process and allows you to not have to take care of it right away because you are so busy (or just get very easily distracted...). 
  8. Peel when you have time and refrigerate for easy meal additions or snacks!
So, to review and make it even more simple...
  • Boil water, add salt, add eggs, bring to a boil, timer for 5 minutes, turn heat off and cover for 5 minutes, put in ice water, peel when you can! 
How to adapt it for different sizes of eggs and if you are super easily distracted or busy doing different things in the kitchen:
  • the 5 minutes boil/5 minutes sit was for some large eggs.  I would take off 1 minute of each step for small eggs.  Try to do eggs that are all around the same size if your eggs vary.  
  • When I cook mine, I set my timer for the boiling part for the exact time because all I have to do is turn the flame off and cover it.  However, for the 5 minutes of sitting in hot water, I set my timer for 3 or 4 minutes because rarely am I ready to take the eggs out of the pot right away.  I hate overcooked hard boiled eggs, especially when the egg yolks get gray and hard, so I set my timer a little early to allow myself some wiggle room with not being ready to put them in the ice water instantly!


Chicken "Noodle" Soup {Stage 1 and beyond}


Stage 1 adjustments: omit parsley, can just boil veggies instead of sauteing

 Ingredients:
2 tbsp fat - chicken fat (from top of chilled broth), coconut oil, butter, or ghee
1-2 cups chopped or diced onions
1-2 cups chopped carrots
Parsley, fresh or dried
4-6 cups chicken broth (depending on how dense or liquidy you like your soups)
3-4 small-medium zucchini
2 cups chopped or shredded chicken
Salt and pepper, to taste
2-3 garlic cloves, crushed or minced

Instructions: 
  1. Saute onions and carrots in your choice of fat until onions begin to turn translucent.  Add Parsley (however much you want!  I used about 1 Tbsp dried).
     
  2. Add broth, bring to a boil.
    Meanwhile, prepare zucchini into noodles - thick by slicing the zucchini into desired size of strips or nice and thin (more like actual noodles) with a julienne slicer!  This time I did thick, but I think we prefer the thing ones with the julienne slicer.
      
  3. Once carrots are tender, add zucchini and simmer (covered or uncovered, whatever you prefer!) until zucchini are tender (time varies on size of zucchini 'noodles').
      
  4. Add chopped chicken and garlic, bring back to a boil and then turn heat off!  Cover and let sit 5-10 minutes.  
  5. Salt and pepper to taste!


Simple Chicken Enchilada Soup {Full GAPS or Stage 3}


Stage 3 adjustments: Omit cheese and use whatever dairy you are doing at this point - kefir, yogurt, or sour cream! It's still great without cheese!  Can also simply boil veggies instead of sauteing. 

Ingredients:
2-3 Tbsp fat (chicken fat, ghee, butter, coconut oil)
1 green bell pepper, chopped
1 1/2 - 2 cups onion, chopped (about 1 medium-large onion)
2 garlic cloves, crushed or minced
optional: small can of green chiles (I never use these because we aren't spice-handling peeps)
2 tsp ground coriander (or up to 1 Tbsp, depending on how much you love coriander)
6 cups chicken broth
2 cups chopped or shredded chicken
2-3 additional garlic cloves, crushed or minced
Salt and Pepper, to taste
At table: 
1-2 cups sour cream, yogurt, or kefir (raw is best)
6 oz shredded raw cheddar or Monterrey jack cheese

Instructions: 
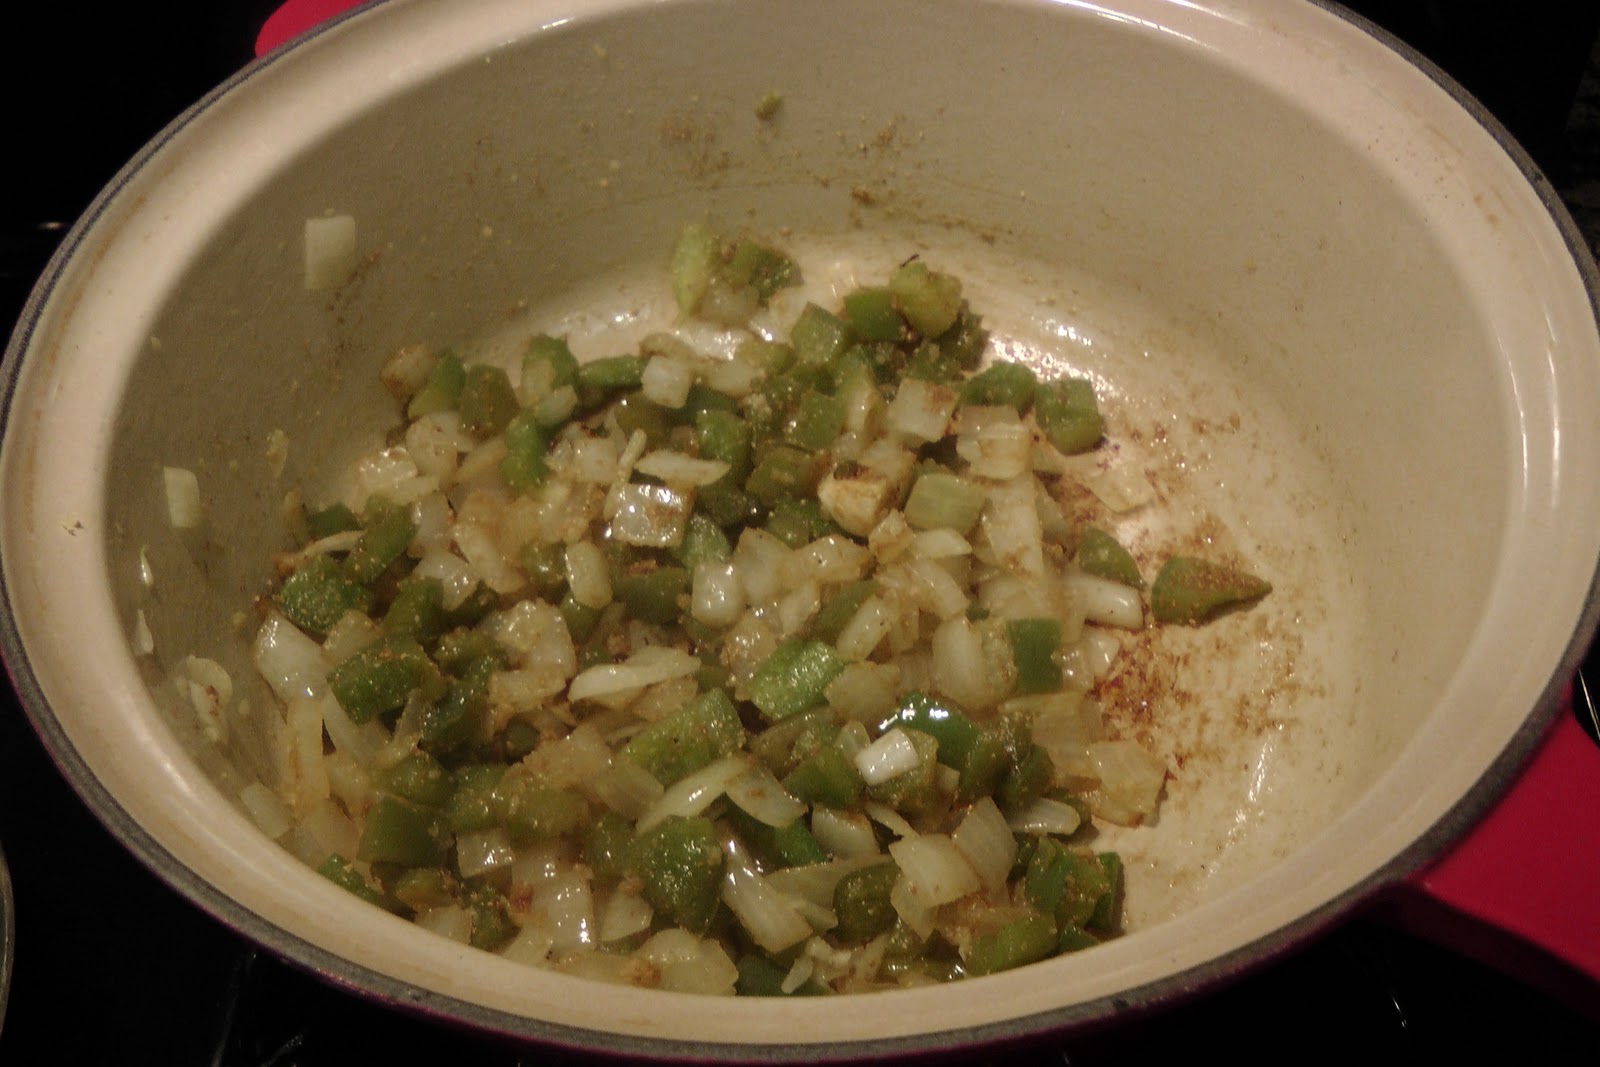
  1. Saute bell pepper, onion, (and optional chiles) and garlic in fat until onions are getting translucent. (The garlic in the tiny glass bowl is the cloves to save for later)
  2. Add coriander and some salt (I start with 1 tsp and then add salt at the end to taste) and stir.  Ah, the smell!
  3. Add broth, bring to a boil, and simmer until veggies are desired 'doneness'.  :-) 
  4. Add chicken, bring back to a boil. 
  5. Add remaining garlic, turn heat off, cover, and let sit 5-10 minutes.  
  6. Salt and pepper to taste.  
  7. Serve soup in bowls, and once the soup has cooled down to being just warm (so as to not kill all the good rawness bacteria and cultures in the cheese and sour cream/yogurt/kefir!!), add cheese and sour cream into bowls.  The amounts in the recipe are for the entire pot, so keep that in mind lest you simply dump all of it into just a few bowls. :-)  You could also add all of it to the pot, but you'd have to wait a mighty long time for the entire pot to cool down to being just warm!  It may not be the most beautiful soup, but it's yummy and we love it!! 

Chewy Chocolate Cookies {Full GAPS}
Ingredients: 
3 egg whites
2 cups almond flour
1-2 tsp vanilla
6 Tbsp honey (or less - or more! - to taste)
6 Tbsp raw organic cocoa powder (non-dutched!)
pinch of salt

Instructions:
  1. Beat Egg whites with vanilla until frothy.
  2. Beat in honey, then stir in almond flour, cocoa powder, and salt.
      It's very dense and doughy.  Keep your kids busy with anything.
      :-)
  3.  Put on parchment paper lined cookie sheets (unless you have good baking sheets and don't need to use it!) in rounded teaspoons.  Note: my cookies did not change shape at all.  They don't fluff up or anything - I am going to play around with this recipe and hopefully get a better shape and texture. So how you put them on the cookie sheet will probably be how they turn out unless I am just not good at this.  I like the taste, though!
  4. Bake at 350* for 10-12 minutes.  I like them less done - dense and fudgy in the middle!! 
These totally satisfied my chocolate cravings and were nice and dark and rich!  Like I said above, I am going to play around with this over time and see if I can come up with a chewier chocolate cookie.  But this was soft and fudgy in the middle, which I so enjoyed!!

I based it off this recipe for cinnamon nut cookies, which turned out the same when I made them.  Maybe it's the almond flour I am using?  They didn't look like her pictures, so maybe I'm doing something wrong.  Oh well, they were still super super yummy to us!!! 

Hope you enjoy something on here!!

Monday, November 7, 2011

Meal Plan! Week 7 {Plan It - Don't Panic}

Here's my meal plan for the week.  Usually things don't go exactly as planned, but it is awesome to have this plan in place, as it is easily adjustable if things don't go as planned.  It is such a blessing to have the weekend planned so that it doesn't surprise me and make for a stressful weekend when all I want to do is be relaxed!

Our camera was out of order last week, so I didn't get to share my broth making system, but I will this week!  I hope to share some more recipes as well as more on GAPS intro.  Soon (hopefully this week) I will start getting into our journey in getting to the way we eat and why.  I am excited to share our process and what we've learned.  I also will share ideas on steps you can take to eat in a more nourishing and healthful, life-giving way!

(meatballs that will be my best friend on Thursday because they're already made and in the freezer...all i have to do is stick them in a pan or crock pot to cook!!  i made 4 lbs worth more than a month ago and they have blessed me on busy days or days I just need a break!)

Monday: 
Lunch: chicken 'noodle' soup
Dinner: Simple Chicken Enchilada Soup

Food Prep: debone chicken, freeze broth, freeze bones for bone broth, possibly make some GAPS cookies to use up egg whites, take 2 roasting chickens and beef meat soup bones out to thaw, batch of yogurt


Tuesday: 
Lunch: leftovers, salad
Dinner: Roasted Chicken (making 2 to freeze 1!) with carrots and onions, Tomato Basil soup, kale


Food Prep: Roast beef meat soup bones and make beef broth, prep veggies for Wed's dinner, make new batch of sauerkraut, kale chips with whatever not used for dinner, make cucumber salad for lunches

Wednesday:
Lunch: Leftover Chicken, Salad, soup
Dinner: Meatloaf maybe kind of like this one.  Mashed cauliflower, broccoli or roasted asparagus

Food Prep: finish beef broth, prep marinade and sauce for Thursday's dinner if time

Thursday: 
Lunch: Leftovers, Salad
Dinner: Meatballs with spaghetti squash, summer squash soup


Food Prep: make snack for small group,  take out hindquarters, bacon, and ground pork to thaw

Friday: 
Lunch: leftover chicken and soup, raw cheese, green beans with butter if needed
Dinner: Chicken Hindquarters Roasted with this marinade and served with the sauce (or use leftover roasted or boiled chicken), butternut squash fries, summer squash soup (broth with cooked veggies already in freezer!)

Food Prep: Prep breakfast sausage, shred zucchini, make carrot soup for weekend, take out stew meat, prep veggies for Saturday

Saturday:  
Breakfast: sausage, eggs scrambled with veggies, zucchini fritters (company, so extra breakfast!)
Lunch: leftovers, carrot soup
Dinner:  beef Bourguinon!!! and spaghetti squash and salad and broccoli


Food Prep: prep breakfast casserole for Sunday, prep veggies and meat for Sunday

Sunday: 
Breakfast: breakfast casserole with sausage or bacon, smoothies
Lunch: Baked salmon or salmon patties, squash fries, green beans, carrot soup
Dinner: Taco Soup in Crock Pot


Food Prep: hopefully just throwing meals together because hopefully all prep work will be done Saturday :-) If not, we'll eat out for a meal to allow for a sabbath.

Thursday, November 3, 2011

Creamy Cauliflower Meatball Soup {GAPS Stage 1 Recipe and beyond}

This is a simple recipe that you can easily modify to fit your taste preferences and dietary tolerances.  We all enjoyed this soup - it is something I will fix again for sure!  I don't think I would serve it to company :-) but that doesn't mean it's not enjoyable, especially for the early stages of GAPS!  It's nice to have a really creamy thick soup to change things up a bit. 

First I will share exactly what I made and then the basic approach to where you can modify it to fit exactly what you need. 

Creamy Cauliflower Meatball Soup
Ingredients: 
Stage 1:
  • 2 heads of cauliflower, stalks removed
  • 1 quart of broth (I used beef)
  •  2 lbs ground beef
  •  Salt (I use about 1 tsp per lb of meat) and pepper
  •  2-3 cloves garlic, crushed
 Stage 2 additions:
  • 2 eggs (only late stage 2 and beyond, once you have successfully introduced cooked egg)
  •  parsley or other fresh herbs (stage 2 and beyond) (I used about 1 Tbsp dried parsley)
Instructions: 
Boil/Steam cauliflower in broth until soft.  While cauliflower is cooking, mix ground beef with salt, pepper, and garlic (and eggs and desired herbs if you are at that stage).  When cauliflower is done, puree it (along with the broth) in blender, food processor, or with stick blender - in batches. Return to pot.  Bring to a simmer.

Drop the meat mixture in desired size of meatballs into the simmering soup.  Try to evenly distribute the meatballs around the pot so you don't have to disturb them before they're done cooking.  And don't expect the meatballs to form like 'normal' meatballs with bread crumbs - they will be very soft.  But don't fear! Just drop them in and let them cook!

Simmer the soup after all the meatballs are dropped in until they are done.   I just let mine simmer for 20 minutes or so, turned off the heat, covered it and let it sit a while because dinner was still an hour or so away.  Then salt and pepper the soup to taste!  You can add some fat like tallow or ghee into the soup as well! 

Variations: It would be so easy to do variations to suit your taste, how much broth you need, what vegetables you like, etc.  Here are some ideas, and I am sure you can easily come up with your own! 
  • Use different broths - I used beef, but I am sure chicken would be good too! 
  • Use more broth to make a thinner soup, and that could help stretch it farther as well. 
  • Add other veggies to the soup - either to puree with the cauliflower or chopped/diced and simmered in with the meatballs. I think peas would be super yummy and go really well with the creaminess of the soup and the meatballs.  
  • You could totally try chicken meatballs - puree boiled chicken and then mix with egg and seasonings and form into meatballs.  Definitely not the same as beef, but maybe it could be good? 
  • Sneak some ground liver into the beef meatballs! 
  • Serve over spaghetti squash as meatballs and 'gravy'.  It's that thick :-).  
  • Different herbs would make fun variations!   
This isn't the most exciting recipe, but we really enjoyed it (both our little boys ate it well!) and it's a nice option for early stages instead of just broth-y soups.  It's very filling, too! 

Wednesday, November 2, 2011

Egg Drop Soup {Another Favorite Recipe - GAPS/Paleo}

Whenever I make egg drop soup, I always feel like it's my favorite thing ever.  I don't know why I love it so much, but I do.  My boys like it, too.  It's nice to have a quick and easy soup like this for lunch or even snacks.  It is easy to make your own variations of this soup depending on what you have on hand and like.  There are notes for variations below the recipe.

This can easily be made in late stage 2 or early stage 3 for GAPS - and to me, this is a great breakfast soup!  But that just might be me :-).  Part of the reason I love this soup so much is that it is nice and dense, so you get lots of goodies in each bite!
 (Pardon the cell phone picture :-) )
Egg Drop Soup
Ingredients: 
  • 4-6 cups chicken broth (have a total of 6 cups of liquid.  I used 4 cups broth and 2 cups water.)
  •  3 stalks celery, sliced
  •  4-5 green onions, sliced, keep whites and greens separate
  •  1 tsp cold pressed sesame oil
  •  1 inch ginger, peeled and grated (easy to grate when frozen) 
  •  2 tsp plus more salt to taste
  •  1 1/2 cups sliced shiitake mushrooms
  •  6 eggs
  •  Optional: 1/2 - 1 tsp wheat free tamari (soy sauce, make sure organic, this is not GAPS approved)

Instructions:
Saute celery (omit celery if needed, or use celery root) and white onion parts in butter (or ghee or coconut oil).  Add broth, grated ginger, sesame oil, and salt; bring to boil.

Add mushrooms when celery is almost tender.  Simmer about 5 minutes until celery and mushrooms are tender.  With soup at low boil/simmer, stir gently while slowly pouring in whisked eggs.

Turn heat off, add green onion parts, cover and let sit for 5 minutes.  Salt additionally to taste and serve!

Variations: 
  • Stage 2/3 adjustments: omit celery (celery root is an option), add yellow onion for more filling if desired.  Omit sesame oil.  The great thing about using a well flavored mushroom like Shiitake is that it brings a great flavor to the soup without having sesame oil and/or tamari in it.  It's still great without the sesame oil!
  • use chopped onion instead of green onion, cook at beginning with celery. 
  • Omit mushrooms, or use a different variety. 
  • more or less ginger, to your taste preferences
  • less eggs for a more 'brothy' soup
  • many recipes for egg drop soup call for toasted sesame oil, so you could use that instead
  • Some others around the web: Food Renegade (omit some GAPS illegals), Grain Free Foodie, Nourished and Nurtured

Tuesday, November 1, 2011

Taco Soup - GAPS and Paleo friendly! {A New Favorite Recipe}

This was one of my experiments this past week, and it turned out amazing!!  We all loved it!  My husband and sister said that it is one of (if not the best) soups I've ever made.  We were so excited to eat this since all taco soup recipes I have ever encountered are full of GAPS and Paleo no-no's like corn, beans, and sometimes rice.  This was so filling, even without all that stuff!

The great thing about a soup like this is that you can really put any amounts of veggies or meat into it - whatever you like and sounds good to you!  You can use more or less of any vegetable, and it would still turn out fantastic.  You could also probably throw some cabbage or spinach or kale in there (although I haven't tried that).  I bet you could even easily sneak a little ground liver in... ;-) And if you eat beans, properly soaked and cooked black beans would be super yummy in here. 

What makes this soup is homemade beef broth (I am going to share my broth making process this week!) and the herbs and spices.  Never underestimate the power of homemade broth!!!

Taco Soup {Recipe - GAPS (Stage 3+), Paleo}

Ingredients: 
  • 3-4 Tbsp of any fat: butter/tallow/lard/coconut oil
  •  1 1/2 lbs ground beef (or combination beef and pork)
  •  3-4 cloves of garlic, minced or crushed
  • 1 large yellow onion, diced (or 2 small - medium)
  • 1 cup sliced/chopped carrots
  • 3 stalks celery, sliced (omit if not tolerated yet on GAPS intro)
  • 2 small-medium turnips, diced (or 1 large)
  • 4-10 tomatoes (4 large, 6 medium, 8 of the size on the vine, 10 Roma tomatoes, you get the idea), chopped
  • 6 cups homemade beef broth

  • 1 Tbsp chili powder
  • 3/4 tsp garlic powder
  • 3/4 tsp onion powder
  • 1 tsp oregano
  • 1 1/2 tsp paprika
  • 4 tsp cumin
  • 1/2 tsp black pepper
  • Celtic or Himalayan or Real Salt, to taste (we used about 1 Tbsp - our broth was unsalted)

Optional: Top with sour cream (or yogurt), raw cheddar cheese, and avocado.  

Instructions: 
  • Melt the fat in a warm dutch oven or soup pot (I always warm my pot up on medium heat).  Brown and crumble the ground beef.  Since the soup will cook more, the meat doesn't have to cook all the way, so you can proceed whenever it is browned enough to be crumbled.  Add garlic, onion, carrots, celery, and turnips.  I also like to add in all the spices/herbs at this point, although you really can add it at any point, as long as you have it in there before simmering.  Stir and cook about 5-10 minutes or so.
  • Add chopped tomatoes and broth (and seasonings if you haven't already).  Simmer at least 20-30 minutes to let flavors mingle and until all veggies are cooked.  Adjust any seasonings to taste (most importantly salt - you don't want too little or way too much!).  I usually start with 1 tsp and then adjust upwards to taste.
  • This made our dutch oven completely full of soup!  Top with desired toppings and serve! 

Note on spices: I actually only used 1 tsp (yes, teaspoon!) of chili powder.  I ran out!  Plus, we have some wimpy spice tolerances in this home (um, me), so I never use much chili powder.  If you want more spice, just add more chili powder!  You could also add more pepper if you really like pepper.  :-) 

Monday, October 31, 2011

Meal Plan! Week 6 {Plan It - Don't Panic}

Last week hit us with a stomach bug in all 3 of the men in the house, me with a nasty cold, and our house with an issue.  So...all that to say we had a night of impromptu eating out and our leftovers stretched longer than I expected (which is always exciting!).  Therefore, there are a few repeats from last week's menu that I get to do this week! 

Monday:
B: Bacon, Scrambled Eggs, Spinach sauteed in bacon grease
L: Leftovers
D: Salmon Patties, Green Beans with bacon grease and onions, bone broth

Food Prep: Make Chicken Bone Broth and sauerkraut, Get supplies for rendering lard/tallow

Tuesday: 
B: egg muffins (save leftovers for Thursday morning)
L: egg drop soup with shiitake mushrooms and green onions
D: Creamy cauliflower Meatball Soup with salad and steamed broccoli with raw butter

Food Prep: finish chicken bone broth, roast beef meat soup bones, render lard and/or tallow

Wednesday: 
B: Smoothies and fried eggs
L: Chicken 'Noodle' Soup
D: Brisket with Carrots and Onions, Side Salad

Food Prep: beef broth (with roasted meat bones and 'dog bones'), prep meat and veggies for Thursday's dinner

Thursday: 
B: leftover egg muffins
L: leftover brisket, salad
D: hamburger soup in crock pot (start AM), Side Salad

Food Prep: finish beef broth
side note: look at all those marrow bones and knuckle bones and meat bones...so rich and wonderful!! 

Friday: 
B: Smoothies and scrambled eggs
L: Pizza (cauliflower, egg, and raw cheddar cheese crust) or leftovers
D: Zucchini Noodle Chicken Spaghetti 'Casserole', Side Salad

Food Prep: Boil Chicken, Save Meat broth, De-bone chicken (meat for weekend meals)

Saturday: 
B: casserole (leftovers for Sunday breakfast)
L: baked salmon (leftovers for Sunday lunch) with salad and veggies
D: Chicken Rosemary Soup (leftovers and any other leftovers for dinner Sunday)

Food Prep: make sure plenty of leftovers for meals Sunday, make chicken salad

Sunday: (leftovers - no cooking!)

I am listing some possibilities for sides/snacks/small meals to make - these are just in case I need more for a meal.  I won't be making all of these, but I wanted to have them listed as a quick resource for my easily distracted brain! :-)

Possible Sides: cucumber salad, beet salad, green salad, green beans in bacon grease, zucchini/yellow squash fritters in bacon grease, butternut squash bake, roasted butternut squash, carrot soup, summer squash soup, pea soup

Print Friendly