Tuesday, February 7, 2012

My go-to Roasted Chicken Recipe

I make a roasted chicken 2-3 times a month.  There is not much easier or tastier than a great roasted chicken.  Especially if you add in some extra hindquarters for extra dark meat. mmmm.... I am so glad we know dark meat is good for us now!  I always get whole chickens for roasting from the amazing farm we use, but I also get lots of hindquarters - kids eat them better, and really, adults eat them better, too. 

I am drooling thinking of that dark meat dripping in roasting juices...

Okay, back to the point of this.  

I pretty much always use the same approach to making a roasted chicken.  Why?  Because it's easy, I'm busy around the house, and I just about jump up and down and yell out of excitement when making the main part of a meal is this easy and fool proof.  I know there are countless ways to roast a chicken, but this is what I do, and my boys and my love always eat this really well.  In fact, I pretty much am always stealing meat before dinner...

I also highly recommend doing this to provide food for a weekend, or on a Sunday so you don't have to do as much food prep work as normal.  Cook as much as you can at once - if you have a crock pot or roasting dish with lid large enough for more than just 1 chicken, do as much as will fit!  Save it for another meal - leftovers or freeze the meat swimming in all the amazing juices.  You'll be so excited to simply pull it out for a meal.

Okay, back to the point of this...again...

This is not an exact recipe, because really, if I don't have to measure anything out, I'm not going to.  I've never measured, and I've always had it turn out so super yummy.  Isn't that the best?  Oh, and the instructions on this might seem long, but it is just because I am sharing how I do things.  I appreciate when others share the process so I can learn from them, so I am just doing that. :-)

This really is simple and easy, and it is a GREAT and easy step to take towards eating more whole foods if you are working on that transition.  I know making the transition from boneless, skinless chicken breasts was a little unnerving for me - making a whole roasted chicken is easy and you don't have to handle the chicken much :-).  

Roasted Chicken {Recipe - GAPS, Paleo}
Ingredients: 
  • Whole Chicken and/or cut up parts/hindquarters
  • Montreal Steak Seasoning (make your own! Recipe below)
  • Poultry Seasoning
  • Good Salt - Celtic, Himalayan - and Pepper
  • Butter or Ghee, or an alternative fat if you can't use ghee or butter yet - like lard
  • Any Vegetables you want to add - onions, carrots, etc - roughly chopped
Process:
  • Prepare your chicken as needed (rinse, clean out insides).  (ours is just the chicken - nothing inside to clean out, so I simply thaw mine - often in a clean sink with warm water because I don't think ahead enough to thaw a whole chicken ahead of time and our fridge is usually so full I don't have room to thaw it in the fridge)
  • Put your chicken/cut up chicken/hindquarters in a crock pot or dutch oven or larger roasting pan. (I have a cast iron turkey roaster - like a dutch oven but giant and oval shaped, so I can fit 2 chickens in or a chicken and about 4 hindquarters.  But I often just do 1 chicken in my crock pot or dutch oven.)  I always do mine breast up, but I know many people like to do chickens breast down to let the white meat cook in all the liquid.  See, you can do whatever you want.  
  • Put some slices of butter (or other fat/oil) all over your chicken.  I don't even bother to melt the butter.  I just kind of evenly space out butter on each piece of chicken and a few pieces on the top of the whole chicken.  I use about 2-3 tbsp of butter on a whole chicken on average, and I probably put about 1/2 tbsp on each hindquarter.  In the picture below, you can see the pieces of butter just randomly placed :-).  You can totally use less - butter can be expensive, so I often vary my amounts based on how much I have in my fridge at the time.  
  • Now go to town sprinkling the montreal seasoning, poultry seasoning, pepper, and much salt all over the chicken.  Don't be shy.   Seriously.  Go for it.  I would estimate that I use about 1-2 Tbsp of montreal seasoning and 1/2-1 Tbsp poultry seasoning, depending on the amount of chicken I am making.  And then lots of salt.  Probably 1-2 Tbsp.  But again, I've never measured.  I just sprinkle it heavily all over.  A lot of help I am if you like to follow exact instructions, huh?  :-)
  • Cook in your crock pot all day on low or covered in oven at 225*-250* until the meat is falling off the leg bones.  You will know it's amazingly wonderful if you try and pick up the leg or thigh piece with tongs or a couple forks and it falls apart or pulls off the rest of the chicken incredibly easy.  I usually cook it for about 6-7 hours in the crock pot on low or 4-5 hours in the oven.  Really, it ends up just being whenever I can get it going at some point in the morning before lunchtime, and I just check on it late in the afternoon to see when it's done.  I never use a meat thermometer - when the meat is separating from the leg bones at the end, it should be nice and done.  
  • Every couple of hours (or at least once about halfway through cooking), baste the chicken with the juices at the bottom.  I usually only remember/take the time to do this once to try and cover all the chicken with the juices and run much of the spices/herbs down into the juices since pouring the juices over the chicken on our plates is our favorite part.  Wow, that was a long run-on sentence.
  • If using vegetables: if you will be gone and are doing it in the crock pot, just add veggies at the beginning around or under the chicken.  If you will be home, you can add veggies a couple hours before it is done if you want.  I prefer to add the veggies at the beginning so I don't have to do anything else :-). 
  • Optional: If you are cooking it in the oven, take the lid off and turn your oven up to 350* or 375*, keeping a close eye on it.  Keep it cooking in there until the skin gets golden and crispy to your liking.  This will also cook the juices down some.  
  • Serve either right off the chicken or, if you have time before dinner, take all the meat off the bones, put in a dish, then pour the juices from the crock pot or dutch oven/roaster over all the meat (strain as you pour).  If I don't have time to take all the meat off before dinner, we just eat it off the bone at the table and use a small ladle or spoon to ladle juices from the pot over our meat on our plates.  Or, if it would make it fun for your kids, put juices in a small bowl or cup and let them dip their meat in it.  
  • Salt is the key to great taste - so don't be afraid to add more salt if you feel it needs more when tasting the juices!   
Montreal Steak Seasoning {Recipe} (um...that I always use on roasted chicken...)

Ingredients: 
  • 4 Tbsp Celtic or Himalayan or Real Salt
  • 1 Tbsp black pepper
  • 1 Tbsp onion powder
  • 1/2 Tbsp garlic powder
  • 1 Tbsp dried thyme
  • 1 Tbsp dried rosemary
  • 2 tsp fennel seed (1/2 Tbsp if you like less fennel)
  • Optional: 1/2 tbsp crushed red pepper flakes (um, we never use because we can't handle spice and neither can our 3 year old)
Combine all ingredients in a jar (I use a leftover glass tomato paste jar) and shake (you can also blend them together in a blender if you have one that will grind it up to a finer consistency). 

Enjoy! This is part of Real Food Wednesday and Traditional Tuesday at cooking traditional foods and whole new mom and Fight Back Friday.

Wednesday, February 1, 2012

Baked Custard {Recipe - GAPS/Paleo}

Update: Find a slightly more simple recipe here in my Baked Custard - Take 2 Post.  I still prefer the custard recipe below as it is richer in taste, but I also love the 'take 2' version! 

We like custard.  I grew up getting a mug of baked custard at Luby's every time we went.  There is a great recipe in Nourishing Traditions for custard that we love.  I don't make it very often because it is rare to get raw cream and I refuse to use UHT cream from the store. 

So yesterday my sweet 3 1/2 year old received a box 'from the man in the big truck' that he had REALLY wanted to give to his daddy for his birthday (it was a yoyo :-) ).  So I decided to make custard for an extra little celebration treat.  But I decided to embrace my fears and use....coconut milk. 

The fantastic thing about custard is that it is a dessert that is full of great things.  Good fats, good egg yolks, and good taste.  I would seriously let us all eat this for breakfast (after eating some other protein and fat) it is so nourishing.  It has honey in it, yes, but it's not much by dessert standard.  And we think it would be great with less honey than the recipe calls for (but we haven't tried it yet).

So back to coconut milk.  I want to get more coconut in our diet, and we are not using raw milk for a while right now.  I am very sensitive to coconut taste, so I was extremely excited when I tasted the finished product and couldn't taste coconut!  Yay :-)

Enjoy!

Baked Custard {Recipe - GAPS/Paleo}
Ingredients: 
  • 1 can full fat coconut milk (Native Forest is organic and does not have BPA in the lining of their cans)
  • 5 egg yolks
  • 1/4 cup honey
  • 1-2 tsp vanilla extract (I used 2 and loved it, but you can also just use 1 and it's still great)
  • Optional: Nutmeg or cinnamon or whatever spice you like
Process: 
  • Preheat oven to 350* and fill a kettle with water and get it hot while you are preparing the custard.  If you don't have a kettle, heat some in a pot or use the hottest water from your faucet.
  • Warm the coconut milk up on the stove.  You can add 4 tablespoons (1/4 cup) of water to make the coconut milk be a full 2 cups.  Or you don't.  Whatever you're in the mood for.  :-)
  • While the coconut milk is heating, whisk the 5 egg yolks with the honey and vanilla until smooth.  Prepare your custard dishes by placing them in a baking dish large enough to hold them.  (I don't have custard ramekins so I just use what I can find...you can also make this in one larger dish like a loaf pan or small baking dish...it will just impact baking time.)
  •  When the coconut milk is warm/hot but definitely not close to boiling (I could still put my finger in it and it didn't hurt...so scientific, I know) slowly pour it into the egg/honey mixture while whisking.  Mix well. 
  •  Pour into your custard dishes, and fill the baking dish with hot water (I usually do about halfway).
  •  At this point, I sprinkle mine pretty heavily with ground nutmeg because that's what I love.  Alternatively, you can wait until after it bakes and sprinkle a spice on top.  It's just what you prefer - try it different ways and see which way you like best.  You could use nutmeg, cinnamon, or some other spice, or you could leave it plain - it's great that way, too!  
  • Bake at 350* for about 50min - 1 hr until a knife inserted in the center comes out clean.  The custard will still jiggle a little when moved.  This will take longer if you use dishes that make the custard much thicker. 
  • Remove and let cool - We prefer to put ours in the fridge and eat it cold. 

Again, I was so pleasantly surprised that I couldn't taste coconut.  If you drink milk, just substitute the coconut milk for 2 cups of whole raw milk or 1 cup raw cream and 1 cup raw milk.  Or all cream. :-)

Enjoy!  This is part of Real Food Wednesday and Fight Back Friday and Superfood Sunday Food Carnival.

Tuesday, January 31, 2012

Amazing Chocolate Cake with Chocolate Orange Ganache and Chocolate Buttercream Icing {Recipe - GAPS/Paleo}

That's just about the longest blog post title for food I've ever done.  :-)  Okay, on to the good stuff...

So I forgot to take a picture before this cake had candles stuck all in it and before we ate more than half of it...oops...

We celebrated my husband's birthday this past 2 weekends ago, and we enjoyed a rich chocolate cake that was entirely grain free and GAPS/Paleo friendly.  All of my family said it was really good (with surprise probably).  I totally just used other people's recipes and paired them together in 1 cake.  Cocoa powder is okay for advanced GAPSters.  We have never noticed problems with it, so we use it for special occasions.

I have made this cake before and used the ganache icing recipe on the entire cake without the orange zest.  I also did not use the orange zest in the cake that time.  It was super good!  BUT I love this one even more.  I also used a buttercream icing on the outside of the cake this time.  I loved the different textures and flavors.  So, you could use just one of these frostings on the entire cake or use both like I did.  Either way, you will love it!

If you want just a chocolate cake and icings, just leave the orange zest out of the cake and ganache.  It will still be amazingly good.

One important thing I want to share - my husband and I both enjoyed multiple slices of this cake (um, even with breakfast...), and we didn't notice any bad blood sugar effects.  Usually when we eat cake (the flour-y, sugar filled kind), we feel awful afterwards, get tired, and have sugar crashes where we don't feel like doing anything and we just want to sit and then just go to sleep.  This cake did not make us feel this way at all!  I love being able to enjoy good food like this without it harming how I feel.  This is a beautiful thing. :-) 

 sorry for the bad picture, but I wanted you to see the texture of the cake and icings


Chocolate Cake {Recipe - GAPS/Paleo}
Original Recipe from Elana's Pantry.  I am posting the recipe here with the modifications I made.
Ingredients: 
  • 3/4 cup coconut flour, sifted
  • 1/2 cup cocoa powder
  • 1 teaspoon celtic sea salt (or other good salt)
  • 1 teaspoon baking soda
  • 10 eggs
  • 1 cup melted butter, preferably grassfed (can use coconut oil instead)
  • 1 1/2 cups honey, preferably raw
  • 1 tablespoon vanilla extract
  • 1/4 teaspoon orange zest (cake is still great without this)
 Process: 
  1. In a small bowl combine flour, cacao, salt and baking soda
  2. In a large bowl using an electric hand mixer, blend eggs, butter, honey, vanilla and orange zest
  3. Add dry ingredients into large bowl and continue to blend
  4. Oil (2) 9-inch cake pans and dust with coconut flour (for ease of removal, I cut parchment paper to put in cake pans and then simply use butter or coconut oil to grease the paper and sides of the pan)
  5. Pour batter into pans and bake at 325° for 35-40 minutes
  6. Remove from oven, allow to cool completely then remove from pans
  7. Frost and serve

Choclate Orange (or not!) Ganache Icing {Recipe - GAPS/Paleo}
Recipe from Nourishing Gourmet
Ingredients: 
  • 1 cup of cocoa powder
  • 3/4 cup of virgin coconut oil
  • 1/2 cup of honey
  • dash or two of sea salt
  • 1 teaspoon vanilla extract (optional)
  • for chocolate orange ganache: 1 Tbsp orange zest
Process: 
  1. Gently melt the coconut oil in a saucepan (you don’t want to heat it, just melt it)
  2. In a food processor, combine all of the ingredients and pulse until well combined. (I have also just whisked this by hand)
  3. Scrape into a small bowl and place in the freezer or refrigerator until it has hardened to desired consistency. It took about 15 minutes in my freezer.  (I check on it every 5-10 minutes and stir/whisk it)
  4. You can use a hand mixer to fluff the frosting up (you may need to do this if the frosting has become too stiff as well).
  5. Spread on desired baked good and enjoy!
Chocolate Orange Ganache Variation: Add 1 tablespoon orange zest with the rest of the ingredients. Continue on with the rest of the directions.

Notes: I used much more honey the last time I made it - I was using a thick honey I recently got and it is not as strong or sweet as honey I normally have.  So, you might need to add honey to taste, especially if you are trying to please a crowd that is used to super sweet sugar-laden desserts.  I probably used about 3/4-1 cup of honey total.  But again, I have made this before with store bought honey that is pourable, and I only needed the 1/2 cup in the recipe.   I also think these would make great truffles rolled into balls and dusted with cocoa powder or shredded coconut...mmmm....

Chocolate Buttercream Icing {Recipe - GAPS/Paleo}
Recipe from Our Nourishing Roots - makes enough for one double layer cake
Ingredients: 
  • 2 sticks butter, at room temperature
  • 1/2 cup raw honey (thick, unfiltered, unpourable honey makes the best icing!)
  • 2/3 cup cocoa powder (raw)
  • 2 tablespoons brewed coffee, cooled (I did not use this, I simply added a couple grinds of himalayan salt to enhance the chocolate taste.  The link above to the recipe at 'Our Nourishing Roots' has a couple different things you could use besides coffee.  I thought it was great without it with a tiny bit of salt added - but be careful and don't add too much!  It is easy to add the salt to taste after it is all whipped together before you put it in the fridge.)
  • 2 tsp. vanilla
Process: .
  1. Put butter and honey into a bowl on your stand mixer (or hand mixer) fitted with the whisk attachment.  Whisk at a high speed for 3-5 minutes until well-combined and light colored.  Turn mixer off and add cocoa powder and vanilla.  Start mixer slow until combined, then whisk on high for another 3 minutes.  Turn off, scrape down the sides of the bowl, unhook the whisk attachment and use to combine by hand.
  2. Chill entire bowl and detached whisk attachment in the fridge for 30 minutes.  Remove and whisk once more for 3 minutes.  Use to frost immediately.  Store leftover frosting in the fridge.
Notes: If you make this ahead of time and refrigerate it, allow for time to sit on the counter to soften before needing to use.  Once soft enough, whisk again to fluff the frosting.  If needed (if it got too soft), repeat step 2 above before using on the cake.

Thursday, January 19, 2012

Brownies and Chocolate Frosting

I can't take credit for these wonderful recipes, but I have to share them because they are so good!

Dense, moist, rich grain-free brownies.  These are the best I've made since going grain-free.

I shared this link yesterday in a recipe sharing post, but I wanted to put it here again because I am thinking about this frosting AGAIN and if you are in a particularly chocolatey mood and love insanely rich things, I bet this frosting would be so good on top of those brownies.  It would be so rich I bet just a few bites would be enough to satisfy any chocolate craving.

Chocolate Butter cream Frosting (scroll down some in the post).  By the way, I could totally eat this frosting all by itself. Honey that is super thick (unable to be poured) makes the best frosting because it makes it very stable and not runny. 

One of the countless reasons we eat like we do is to heal our bodies and restore them to the way they were meant to function, which means living without cravings.  But sometimes I just want a little chocolate, you know?  It's a process... :-)

Wednesday, January 18, 2012

Recipes to Share, including Christmas Recipes we loved

Just random recipes I thought I would share!  This is a completely random collection of recipes. 

I want to try this.  I'll let you know if I love it... Salmon Chowder.


Things I've tried and love:
  • Bacon Candy (GAPS/Paleo)
  • Bacon Wrapped Sweet Potato Bites (Paleo since sweet potatoes aren't GAPS legal)
  • Salisbury Steak (GAPS/Paleo) (I didn't use the coconut milk in the gravy and it was delicious.)
  • Salmon with chimichurri sauce (used leftovers of this sauce on salad with yogurt drizzled over it as well and loved it!).  
  • Ultimate Beef and Liver Chili  (We loved this.  It really is delicious and a great way to get liver into your diet.  I can't stand liver, but I loved this.  Note: After eating it the first night, I added tomato puree (bionaturae brand in glass jars - 24oz) and I thought this made it even more delicious and closer tasting to chili we used to make.  So, from now on, I will make it following her recipe, but add 1 bottle of this!)
  • Grain Free Mini Pizzas (Love these and our boys love them!  Quick and easy snack or meal.  If you can't or don't use cheese, I think these are great without cheese - just sauce and some meat on top.  Not exactly like a pizza without cheese, but still fun and tasty!  Pardon the messy example here - I just had raw cheese curds, not shredded cheese, so they look a little crazy!)
  • Marshmallows (original) (In case my last chocolate marshmallow crazed post didn't communicate enough how much I love these.)
  •  Yellow Coconut Cake with Chocolate butter cream frosting  (the cake is good! it doesn't taste like coconut, and I even used coconut milk.  But what's amazing is the frosting!  I didn't have coffee on hand and so I added a little bit of salt to the frosting to enhance the chocolate flavor and it is AMAZING.  I just got new raw honey in that has to be scooped it is so thick, and it makes the frosting thick and stable almost like frosting out of a can that I used to eat with a spoon.)
  • Leftover Turkey Stew (I know it might be a little late on this, but we still have some turkey meat and broth in our freezer we could use this for.  We made it once already and like it a lot!  The picture below is before it cooked, hence the lack of turkey :-). )

Successful things from Christmas Dinner: 
  • Stuffing (We LOVED this and I will probably be making this every now and then throughout the year because it is that good!  It is also great for a good and easy breakfast - use leftovers and scramble with some eggs.  Mmmm... I did not use any of the spicy spices :-).  Seriously, though, this was amazing.)
  • Sweet Potato Casserole (Paleo but not GAPS friendly.  To make it GAPS friendly, you could use butternut squash instead of sweet potato and honey in the candied pecans.  I would share substitutions, but I haven't tried it :-). )
    •  Sweet Potato Casserole {Recipe - Paleo}
      • Ingredients: 
        • 4-5 medium/large sweet potatoes
        • 1/2 - 1 tsp fresh grated ginger (peel and freeze, then grate!)
        • 1 Tbsp ground cinnamon
        • 1/2 tsp ground nutmeg
        • 1/4 cup pure maple syrup
        • 1 tsp vanilla
        • 4 Tbsp organic grassfed butter
        • 1/2 cup raw cream or coconut milk (you really can't taste coconut!)
        • 2 eggs
        • 1 cup chopped candied pecans (these are so good!)
      • Process: 
        • Bake the sweet potatoes in the oven until nice and soft, take out and remove skin
        • In a large mixing bowl, mix sweet potatoes with all other ingredients except pecans.  You can either mix simply by using a potato masher if you want a finished casserole that has a little more texture, or you can use a mixer or stick blender to make a less textured, softer casserole.  I have done it both ways and loved it both times!
        • Place in a baking dish of your choice (pie dish or square dish works well) and top with chopped candied pecans.  Bake uncovered for about 30 minutes at 350*. 
    • Cranberry Sauces (Chunky) (Blended and Gelatin-y)  (We love both of these and if I can find frozen cranberries, I will make this again before Thanksgiving/Christmas!  We doubled both recipes and froze in small glass containers.  It freezes well and our little boys loved it mixed with leftover turkey.  Therefore, I think they'd easily eat chicken mixed with this.  Easy lunch for littles? YAY!)
    Hope you enjoy!

      Sunday, January 15, 2012

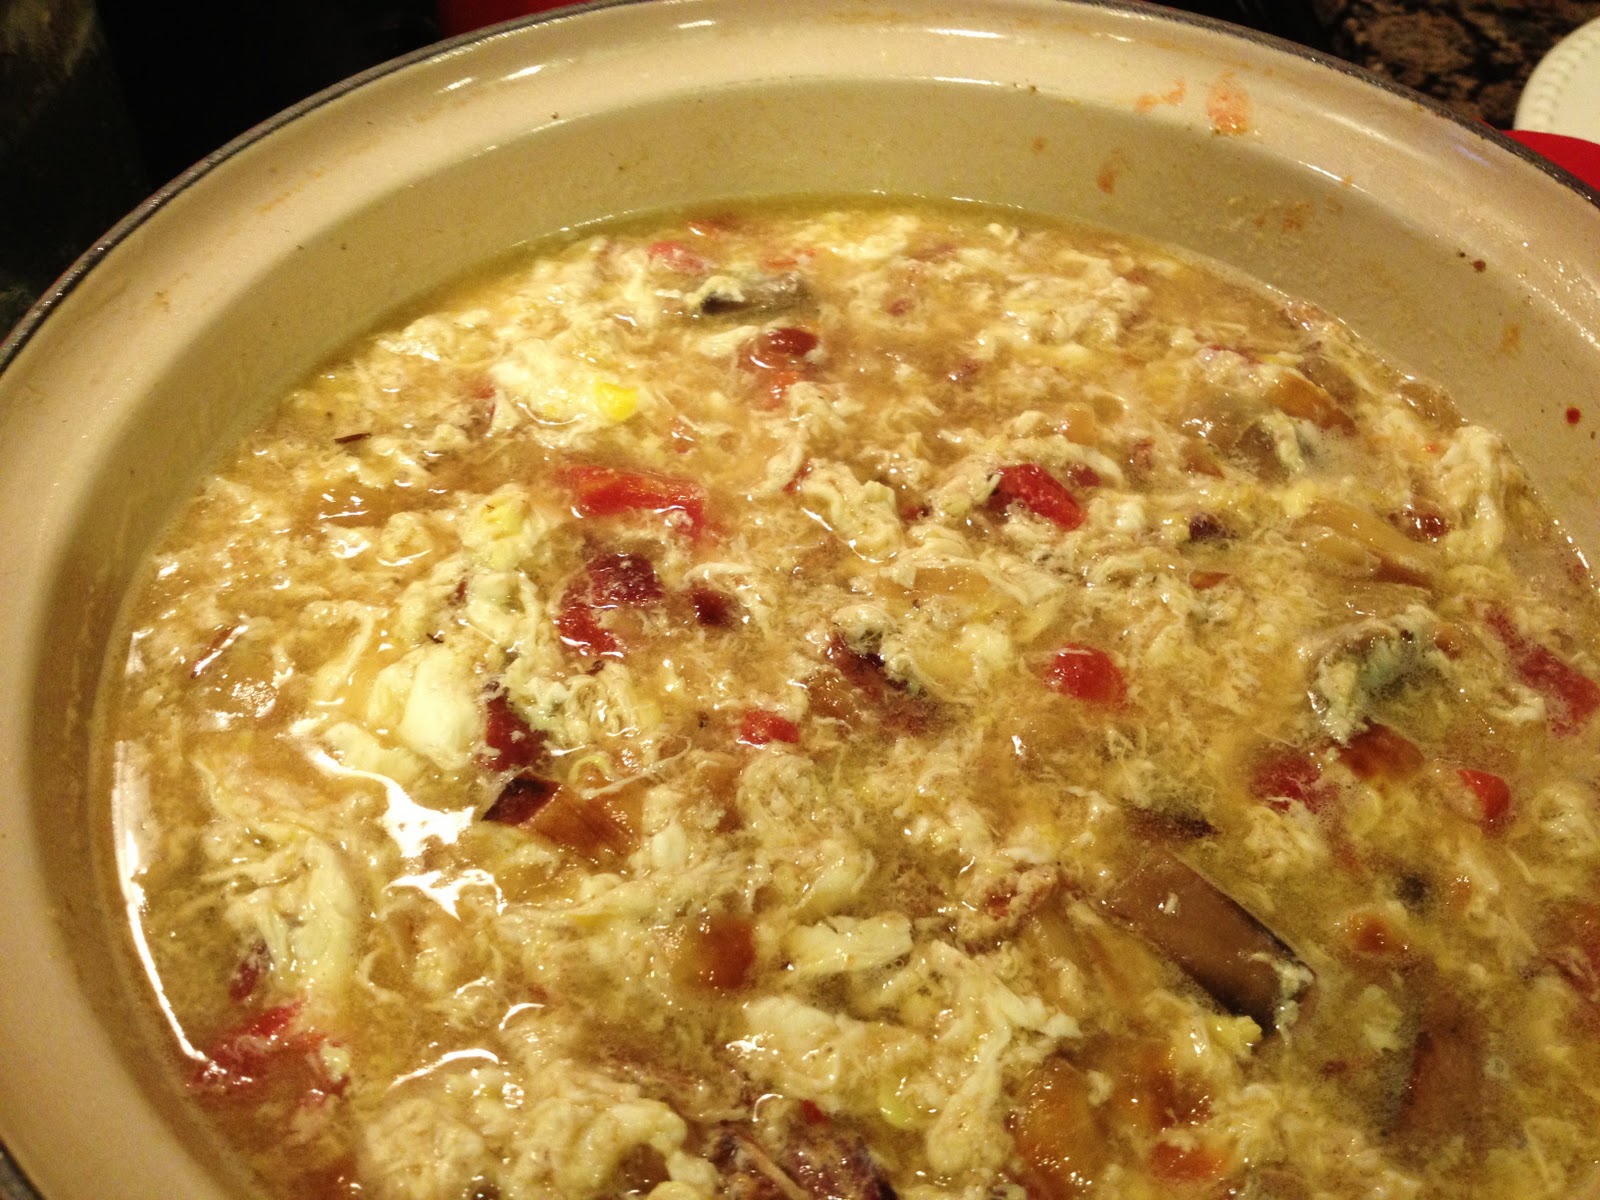
      Omelet Soup {Recipe - GAPS, Paleo}

       This is part of Fight Back Friday and  Sunday Night Soup Night !

      Omelet Soup.  Does that sound weird?  Well, welcome to my soup world.  Whether you are on GAPS, eating Paleo, or just trying to eat a traditional whole foods diet, soup is a fantastic way to increase the nutrition and healing properties of any meal as well as make it much more easily digested.  I love eating eggs for breakfast, and lately I have been trying to eat as big of a breakfast as possible.  It sustains me through the day with much energy - especially through that late morning craze that seems to take over little children before they eat lunch ;-).

      However, I notice that at a certain point, I cannot eat much more although I know I need to.  I feel a little nauseous and heavy and I just can't stomach eating as much as I know is good for me.  Enter soup.  Broth enables me to eat more and not feel sick AT ALL.  It helps with digestion and provides tons of great things like amino acids and minerals and gelatin and all that good stuff.

      Also, since I love GAPS and am focusing on getting more broth into our diets, hopefully with at least 2 meals per day, I need a way to incorporate broth into another meal.  I'm not the hugest fan of drinking plain broth.  So I thought I would figure out a way to combine a favorite - an omelet - with something that is tasty, healing, and needed - broth. 

      This was inspired by our immense love for egg drop soup.  We eat it for breakfast often, but I wanted to provide us a little more variety.  So, although I know it sounds weird, don't write it off until you try it! :-) It's super yummy and fun!

      Omelet Soup  {Recipe - GAPS, Paleo}
      GAPS Notes: This is appropriate for Stage 2 once you have had cooked eggs in broth.  You would probably need to omit the bacon (maybe use some other meat like ground beef or chopped ham steaks boiled in the broth instead of bacon) until roasted and pan cooked meats are allowed.  But you can easily adapt this to stage 2!

      Ingredients: 
      • 8 oz uncured bacon
      • 1/2 medium onion, chopped
      • 1 1/2 cups mushrooms, chopped
      • 1 quart chicken broth (meat or bone)
      • 1 cup chopped tomatoes - fresh or canned with juices drained
      • 6-12 eggs, pastured
      • Salt and Pepper to taste
      • Optional: spinach or kale (2-4 cups depending on how much you want)
      • Optional: Parmesan or Raw Cheddar Cheese
      Instructions: 
      • Two options for beginning: 
        • Some prep the night before:
          • You can either prepare your bacon and onions in the oven (little oversight and easy clean up) or you can fry the bacon on the stove top and then saute the onions in the bacon grease in the same pan.  So, either bake the bacon in the oven around 350-375*, turning every 10-15 minutes until crispy, or fry the bacon in a pan until crispy. 
          • Remove the bacon from the baking dish or frying pan.  If preparing in the oven, simply add the onion into the pan, stir to get it all gloriously mixed in with all the amazing bacon grease and roast for about 20 minutes, stirring halfway, until they look all soft and yummy.  If preparing on the stove top, just saute in the bacon grease until soft.  I simply prefer doing it in the oven because it is less work. :-)
          • Save your bacon and onions separately for the morning. 

        Bacon baked in the oven.

       Onions added to the baking dish.
       Onions roasted in the oven, all soft and yummy.
        • No Prep the night before: Simply follow the above steps of your choice (oven or stove top) the morning of.  If I do it the morning of, I simply would fry the bacon and then saute the onions in the pot I am going to make the soup in. 
      • With the onions in your soup pot, add chopped mushrooms and saute together until mushrooms are browned. 
      •  Add bacon, crumbling into bite size pieces.
      •  Add your broth, tomatoes, and about 1 tsp celtic sea salt.  Bring to a boil.  (Add kale or spinach here if using for the whole pot of soup)
      • While the soup is coming to a boil, whisk all eggs together in a large measuring cup or mixing bowl (easiest if it has a pour spout).  I put a large range of the number of eggs because it really simply depends on how thick and egg-y you want your soup.  We wanted a very hearty thick soup with many eggs per person, so I used 12.  You really can't mess this up!
      • Once the soup is at a boil, stir the soup gently in a circle while slowly pouring the whisked eggs into the soup.  Once all the eggs are poured in, I always bring the soup back to a boil and then turn the heat off as soon as it starts bubbling.  I don't want rubbery overcooked eggs :-). 
      •  Salt and pepper to taste and enjoy! 
      • Our little boys won't eat spinach in soup, so we simply put about 1/2 -1 cup chopped spinach in our bowls of soup because the soup was hot enough to wilt the spinach. 
      •  Optional: top with cheese of your choice!

      Enjoy!  It really is delicious! This is such a fantastic way to get broth in with breakfast!  Or even to have a breakfast for dinner soup.  And I think it could easily be modified with what you have on hand and what you like for breakfast.  Just imagine what you would like in an omelet, and put it in there!  Also, try using chopped ham steaks instead of bacon, or even ground beef or breakfast sausage!

      It's funny how I get so excited about a new and easy soup option for us... :-)

      Tuesday, January 10, 2012

      Chocolate Marshmallows {Recipe - Delicious and GAPS/Paleo!}

      Oh. Goodness. Ilovechocolate.

      And Oh. Goodness.  Ilovemarshmallows.

      I must admit I totally ate some horrible deadly ones around Christmas.  Pretend I didn't say that.

      But really, I was SO excited to find this.

      And I just recently made them and ate the whole batch in a matter of 2 days.  YEP.

      Pretend I didn't say that either.

      So on another note, I have been 10 whole days without coffee.  BIG.DEAL.

      That also means 10 days without insane doses of honey in my coffee.

      Bring on the cravings for chocolate and sweet things after I got through the first 2 days of headaches, nausea, and naps.

      So I decided after making some crumbly dry chocolate almond flour cookies that I would try making chocolate marshmallows.  ohJOYJOY.  Yep.  Thankfully, I only made a 1/2 batch, because 24 hours later, they're all gone.  But my little boys did eat their fair share.  I think I have a problem...

      Anyway, they are awesome and marshmallowy and almost fudgy.  Can I go make another batch now?  Oh, wait, I should make dinner...

      MAKE THESE (plain and chocolate) TODAY.  You won't be disappointed.

      The plain ones are amazing...go here to get that recipe and the instructions.

      Here is how I adapted it to make chocolate marshmallows.

      Chocolate Marshmallows {Recipe - GAPS/Paleo}
      Ingredients: (this is for a half batch as compared to the linked original recipe above.  My thought is, make a whole batch and once it gets all fluffy and creamy, pour half into a pan to have as regular and then add the cocoa paste as below to have chocolate ones as well!!!  So, if you want to do that, just double all ingredients except the chocolate. )
      • 1/2 cup  filtered water (split into quarter cups)
      • 1 1/2 Tbls Grass fed beef gelatin
      • 1/2 cup organic honey
      • 1/2 tsp vanilla gluten free organic extract
      • 1/8 tsp salt
      • 2-4 Tbsp raw organic cocoa powder*
      • 1-2 Tbsp of warm water
      Process: 
      • In a medium-large mixing bowl, mix half of the water (1/4 cup) and the gelatin together.  Let it sit while you do the next step. 
      • In a saucepan, mix the honey, the remaining water (1/4 cup), vanilla, and salt together and bring to a boil. 
      • Simmer for about 7-8 minutes (it is helpful to use a candy thermometer) until it reaches 240*.  I have done this a few times and I have never gotten it to reach 240*, only about 220* or so.  Mine have always turned out great.  
      • While the honey mixture is boiling, mix your cocoa powder and warm water together in a small bowl to make a paste (only use enough water to be able to mix the cocoa powder into a paste). 
      • Turn on your mixer (I use a handheld mixer) and pour honey mixture into bowl to combine with gelatin.  I have used regular beaters and the whisk attachment.  Use the whisk attachment.  They both work, but it is much less insanely loud to use the whisk :-).  Mix at your highest speed (I usually only do speed 5 out of 6 because I can't handle the noise of speed 6 for 10 minutes...but I have oddly sensitive ears sometimes) for about 10 minutes until it is thick and like a marshmallow cream.  
      • If you are doing a full batch (double all ingredients), pour about half into an 8x8 or really any size pan (the size only impacts how thick they are) that is lined with parchment paper.  If you are only doing the half batch, proceed with next step.  
      • Add the cocoa powder paste and mix well with your mixer - you can add little by little if needed until it suits your chocolate taste buds.*  :-)  I used at least 4 tbsp when I made mine, and they were pretty dark and rich in their chocolate taste, which I loved.  Use less if you like mild chocolate flavor.  
      • Pour into a pan (I used 8x8) lined with parchment paper sticking up all the sides (picture below).  
      • Let it set!  It doesn't take too long to set, but the time depends on the temperature and humidity of your kitchen as well.  Also, I think the texture the next day is the best, but you can be sure I never wait until the next day to eat them! :-)
      • You can do coatings as described in the original recipe linked above this recipe, or you can coat it in cocoa powder afterwards.  I think coating these with some chopped nuts would be amazing.  
      *NOTE: the chocolate taste is significantly stronger after marshmallows have set!  When I was tasting mine while mixing it all together, I could not taste the cocoa very well - but once I poured them out and they sat for a bit, the chocolate was pretty strong!  thankfully, I like strong, but keep that in mind when making them!  It might be something you figure out over time - just keep notes as to how much cocoa powder you used so you know what amount you like best! 
       
      (this picture is after I had poured it out and I was making dinner and I couldn't stop myself from scraping some out to try before they had fully set!!  I am crazy!)
        The next day, or even later the same day you make them, they are much easier to cut into squares.  Don't leave the plate in sight of littles, because they will push stools and chairs over and eat them all.  Ask me how I know :-).

        Enjoy! 

        Print Friendly